How to integrate 123FormBuilder with Google Calendar
The 123FormBuilder – Google Calendar integration allows you to create forms from which your visitors can:
- Create events directly into one of the calendars from your Google Calendar account.
- Register as attendees at existing events from your Google Calendar account.
Enabling the Google Calendar integration
You can enable this integration from the Integrations section with your form builder account. Use the search functionality to search for Google Calendar.
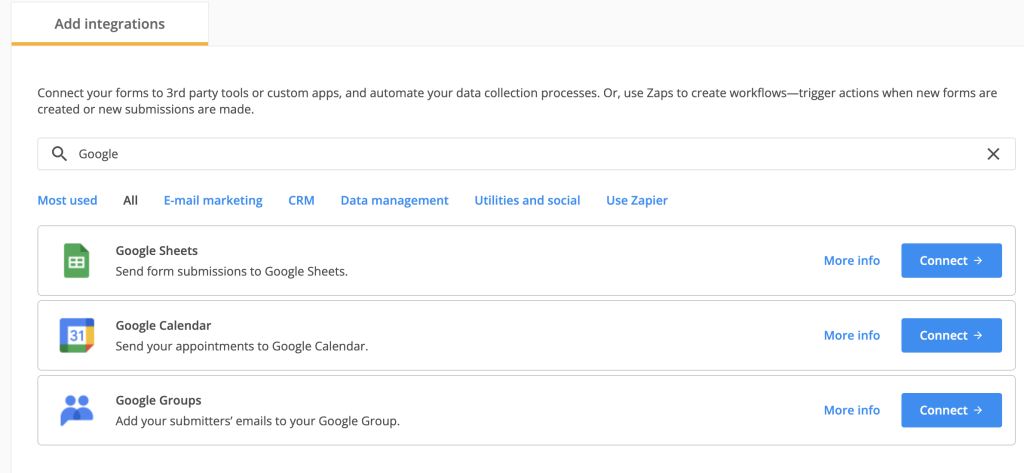
Now follow these steps to enable the Google Calendar integration for your form:
1. Click on Connect.
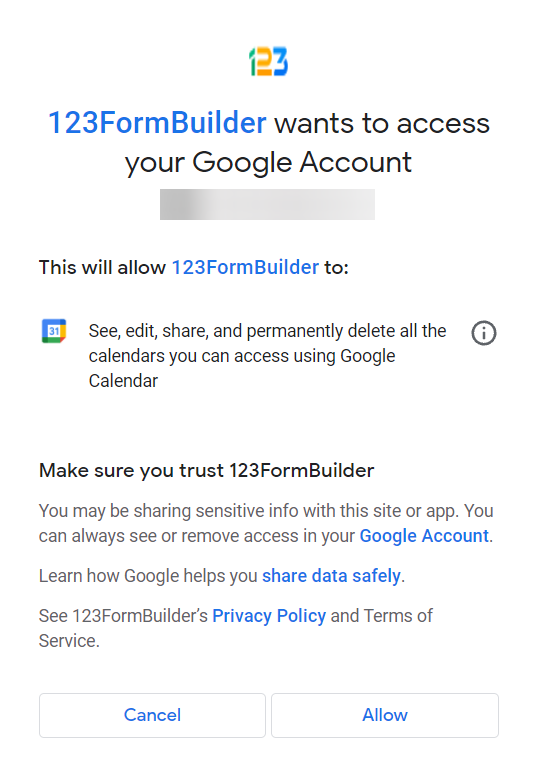
2. Click on Allow in order to let the application make any necessary changes to your Google Calendar account.
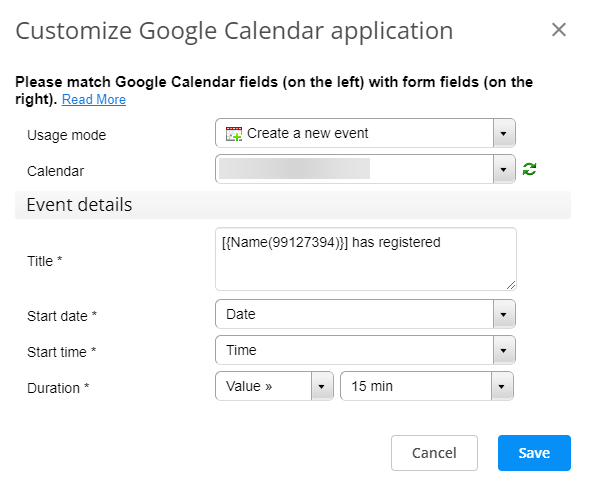
3. A popup will appear, the Customize panel, where you have to associate Google Calendar fields with 123FormBuilder fields and hit Save. These associations establish how the information is passed to your Google Calendar account.
4. From Usage mode, select the type of action you want: Create a new event or Add an attendee to an existing event.
It’s really recommended that you set as required the fields you’ll need to associate in the Customize panel. This way, there won’t be any errors when creating or attending an event, users being unable to submit your form without completing all the fields. If you do not make the fields required, users may skip some of them and the information will not succeed in your Google Calendar account. In short, even though a submission will pass successfully, if not all fields have been completed, no event will be created or the attendee will not be added to your event.
5. In Error handling (bottom page) you can add your email address, in case your submissions encounter any problems. If you delete an event and later someone is trying to attend it or if you delete a calendar where someone is trying to create an event, you’ll receive an alert in your inbox with details of the submission.
These were the steps for using the Google Calendar application for your form. Below you can find the steps for setting up the two types of actions that this integration allows:
- Creating new events.
- Adding attendees to one of your events.
To create a new event
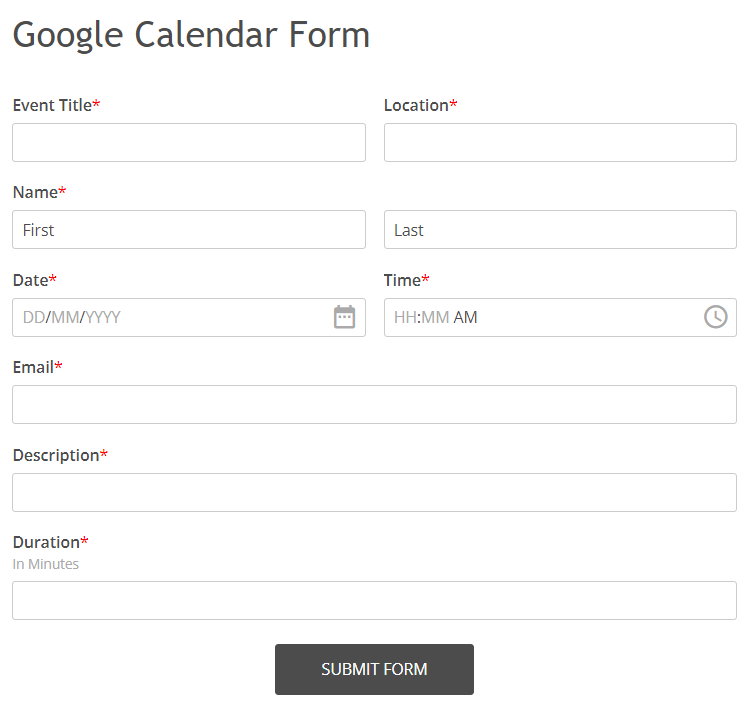
1. On your form, you’ll need to add the fields Name, Date, Time, Email, Number (for Duration), and three Short Text fields (for Location, Description, and Title). Make the fields required, as specified earlier.
2. Afterward, access the Google Calendar integration from the forms Integrations section. Select Create a new event from Usage mode, in the Customize panel.
3. In case you have more than one calendar in your Google Calendar account, choose the calendar where you want to create the event. If you have problems finding your desired calendar, press the Refresh button on the right.
4. You can choose to write a title in the assigned box or associate the appropriate field from your form in the dropdown list below. Don’t forget to click Add in order to set the field’s input in the Title box.
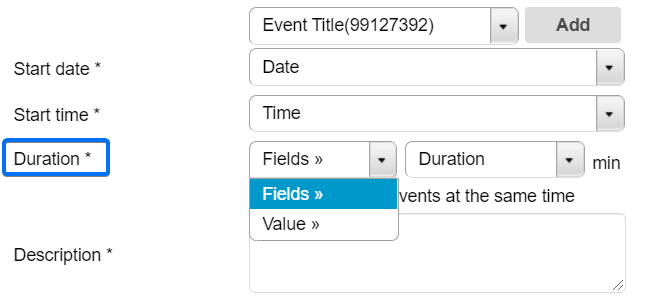
5. You can set the duration of the event in two ways:
- Value – where you have five options available: 15 minutes, 30 minutes, 1 h, 1.5 h, 2 h.
- Fields – where you can assign a Number field from your form where users will specify the time in minutes.
6. The Description box can be set the same way as the Title.
7. Associate any field you want from the dropdown list for Location.
8. You can allow multiple events to happen at the same time in your Google Calendar account, by enabling this option in the Customize panel.
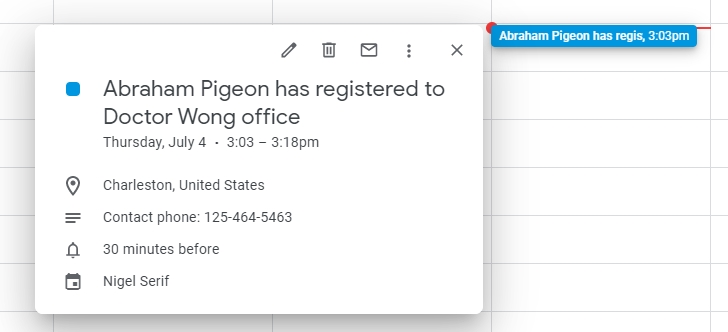
9. Lastly, click Save, and next time you receive a submission you’ll find the created event in your Google Calendar account like in the example below:
To add an attendee to an existing event
1. For this option, on your form you’ll need to add and set as required only the fields Name and Email.
2. Once you’re done, return to the Google Calendar integration from the Integrations section and select Add an attendee to an existing event from Usage mode, within the Customize panel.
3. Select a calendar and make sure that the associations for the Name and Email fields are made correctly in the Attendee details section.
4. In Event details, choose the desired event. Search for it by Date and select its name from the dropdown list below.
5. Lastly, click on Save to finish setting up the integration.
10 comments
Leave a Reply
Your email address will not be published.
Similar Articles
Frequently Asked Questions
Here is a list of the most frequently asked questions. For more FAQs, please browse through the FAQs page.






My form has two multiple choice section.
I want to add the choices selected to be added in the multiple choice field.
I submitted a test form, and it does not appear on the calendar details
Hi Diego, please reach out to us at customercare@123formbuilder.com and share with us the name of your form so we can look into this. Thank you!
can the form have a captcha to prevent abuse, or even an approval step?
Hi Jon, our forms have by default enabled captcha. It will appear on the second time the form is submitted to prevent spamming. Please check our captcha article here: https://www.123formbuilder.com/docs/what-is-smart-captcha/ . Also we have an article as well about our approval feature if you are interested: https://www.123formbuilder.com/docs/email-automation-and-trigger-based-notifications/
Have a great day!
hello, do you think it will be possible to have field *time* not being required. for example if i wanted to link a day event through the api, i don’t need the time field. date will be enough.
Through our integration it is necessary to map the time field to for the event to be created. I am afraid that you will need to have it set required to ensure that the data is passed to your calendar.
Hi,
On a form with 2 fields “date”, for check in and chek out; and linked to Google Agenda; doesn’t show duration length on Google agenda.
1/ I went to Customize Google Calendar application
2/ in “Duration ” it offer me: “fields” or “value”
3/ I try “fields” to get the second “date” field from my form, but offer to me this possibility. Only a number in minutes. In value, same, choice of minutes.
Hello Cedric!
You cannot map a Date field to the duration of the event. Duration implies the number of minutes the event takes place, so only the Number field or a text box with numeric validation can be used. What you are looking for is an end date, an option that our integration does not provide.
In conclusion, when the form visitors create events in your Google Calendar, they will need to specify the duration of the event in minutes, not the date when the event will be over.
For further assistance, don’t hesitate to contact our Support Team at support@123formbuilder.com or via our contact page.
Thanks!
I am unable to put the start date for the event, I dont why but its not showing any drop down menu
Hello!
To put a start date, you’ll need to add a Date field to your form. The field has to be set as required, otherwise the form users might skip it and the integration will not run with that respective submission.
For further assistance, don’t hesitate to contact our Support Team at support@123formbuilder.com or via our contact page.
Thanks!