123FormBuilder integrated with Google Sheets
The new Google Sheets integration
The Google Sheets integration allows you to send form submissions to Google spreadsheets. Before integrating with Google Sheets there are a few things that you should be aware of:
- Do not delete any spreadsheet columns generated by your form fields. You can delete fields from your form but not their corresponding spreadsheet column in Google Sheets.
- Do not reorder the columns in your spreadsheet. You can add fields to your form, but keep in mind that the newly generated columns will always be listed after the existing columns in the spreadsheet.
- Selecting a group of cells and sorting/filtering data will break the integration.
- If you want to pause data transmission to your spreadsheet, use the Enable/Disable toggle–do not remove your integration. Removing your integration and adding it again (even when using the same account) always generates a new spreadsheet.
Setting up your integration
In order to use the Google Sheets integration, you need to be on a Starter plan if you are on Wix, a Silver plan if you are on Weebly, or a Gold plan on all the other platforms.
To add the Google Sheets integration to your form, open it in editing mode, then navigate to the Set up tab in the header bar. When in Set up, locate the Integrations tab on your left side menu and open the section. The Google Sheets integration is at the top of the listing on this page.
Add the application by clicking on the Connect button.

Authenticating a new account. Connecting a previously authenticated account
If you have never authenticated a Google account with 123FormBuilder before, you will be redirected to a screen where you can grant the necessary permissions to initiate the integration.

If you have Google accounts that have been previously authenticated with 123FormBuilder, you will be able to locate them in a dropdown menu on your left-hand side. The counter displayed next to the name of the Google account specifies the number of active connections on that specific account.
Clicking on any of the accounts in the dropdown will automatically initiate the connection, without the need of authentication.
However, if you want to connect a different account than those listed in the dropdown, you may do so by clicking on the Sign in with Google button on your right-hand side and begin the authentication flow for that specific account.

Activating your integration
After the connection between your Google account and 123FormBuilder has been created, the next step is to choose the file location: whether you want to create a new spreadsheet or use an existing spreadsheet.

Create new spreadsheet
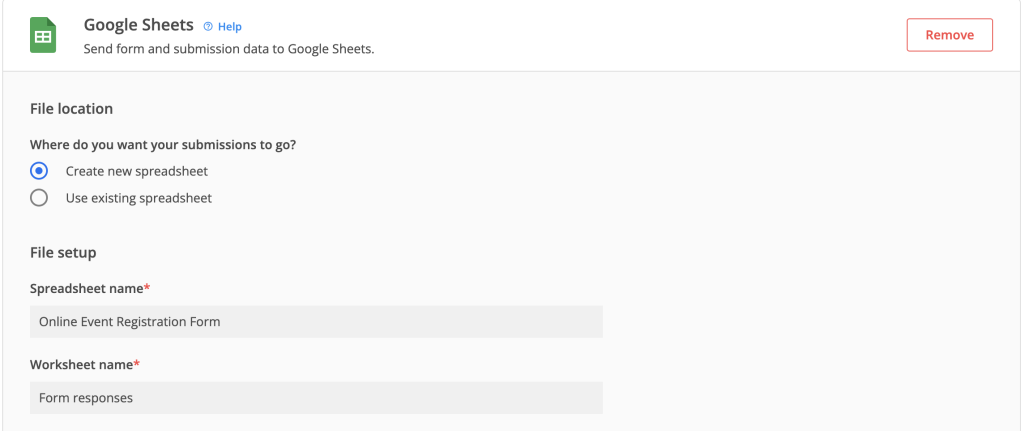
When choosing to create a new spreadsheet, the next step would be the File setup.
By default, the spreadsheet name is the same as the form’s name, but you can easily change that by clicking within the text input. The worksheet name is by default set as Form responses, but that is editable.
Use existing spreadsheet
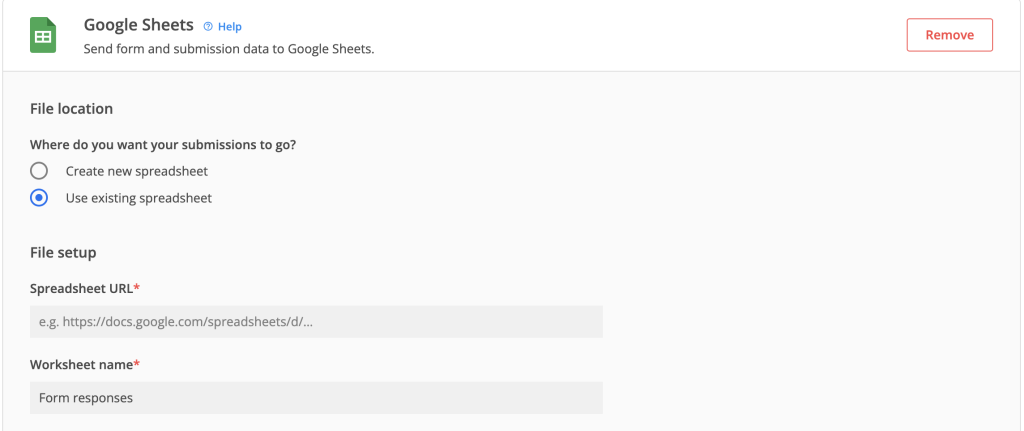
When choosing to use an existing spreadsheet, you will have to provide 2 details. The first one would be the spreadsheet URL. You simply have to take the URL of your spreadsheet and paste it in this input text box.
The second detail needs to be the Worksheet name. By default, it would be named Form responses.
Note: let’s say you already have a worksheet named Form responses within the same spreadsheet. When clicking Save, you will receive an error that a sheet with the same name already exists.
Data format
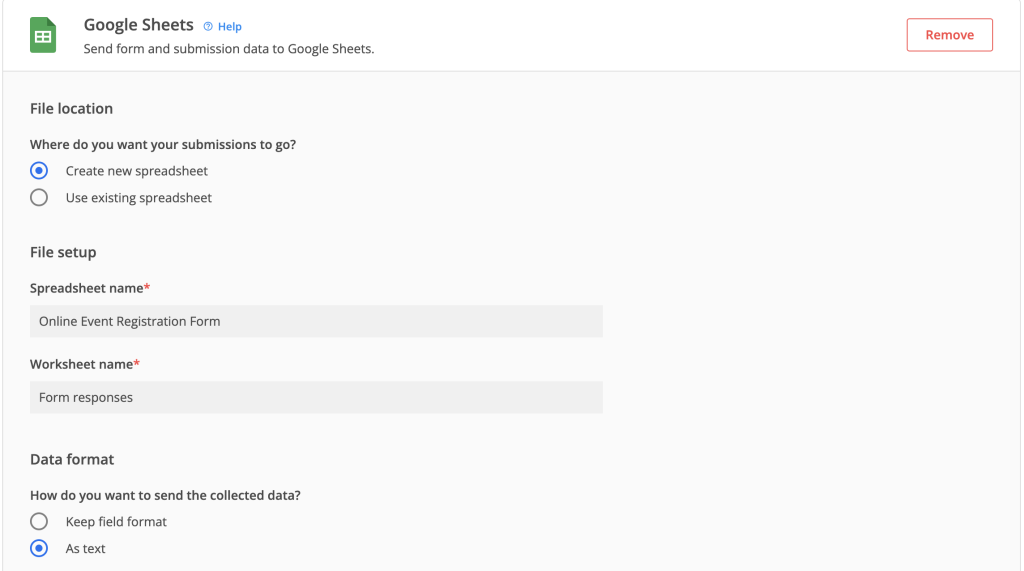
The next step would be to choose how you want to send the collected data. By default, the data is sent as text, but you can choose to keep the field format.
Field data
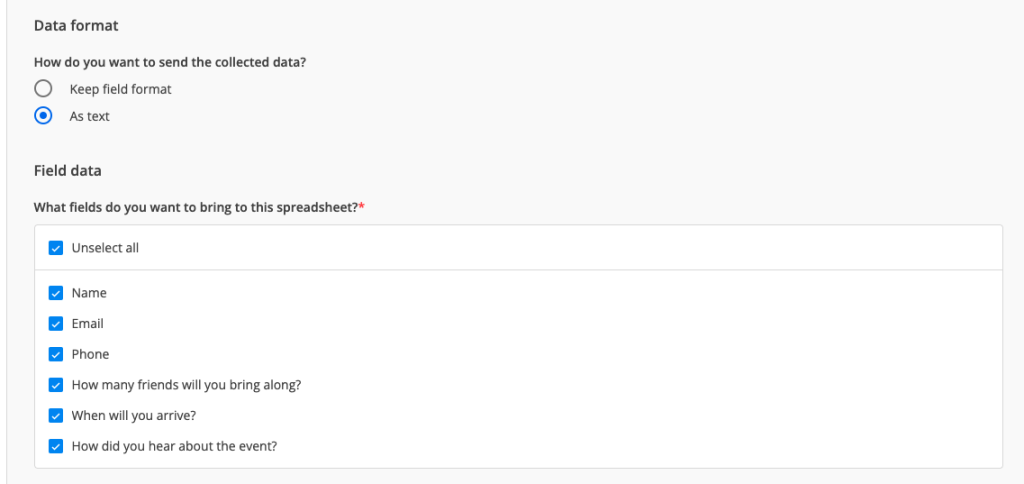
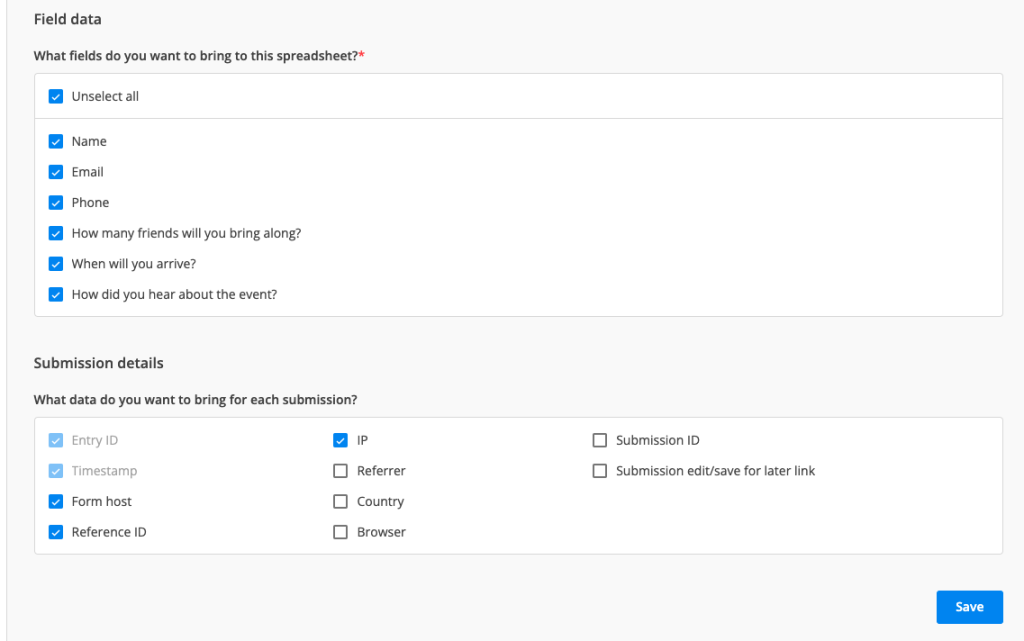
By default, all fields from your form will be selected. You can customise this according to your needs and click on Save.
The next step is to select which fields you want to send out to your spreadsheet.
Submissions data
Going further, you can customise what type of submissions data you want to send to your Google Sheets.
You have a variety of data to choose from, but what is important to notice is that Entry ID and Timestamp are checked by default and they can not be edited. These variables will always be sent to your Google Sheet.
Notes
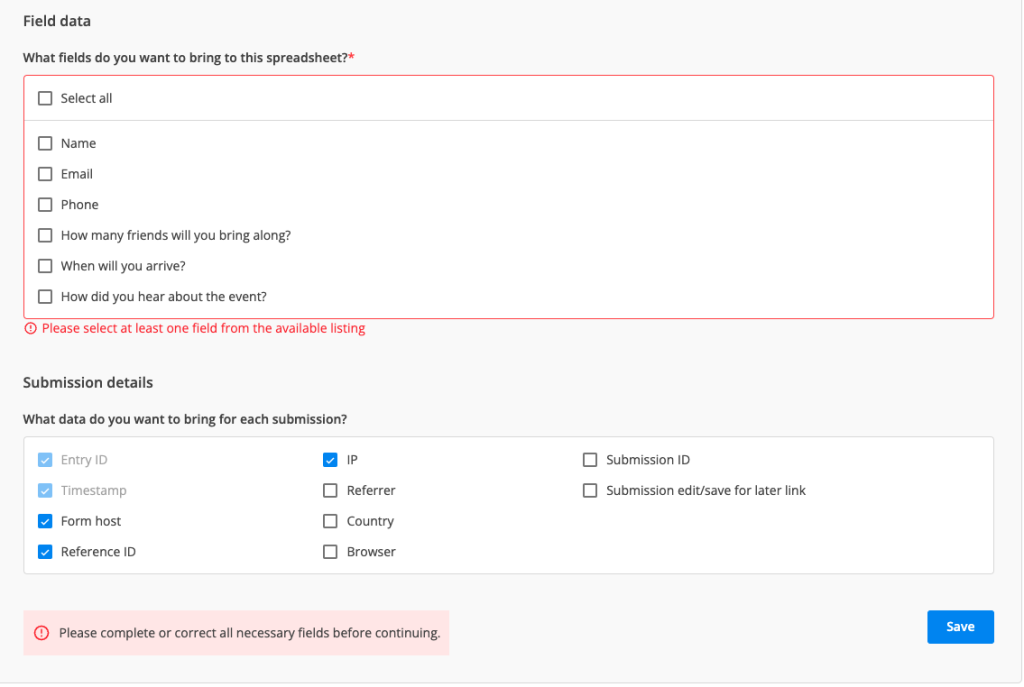
You can not save the Google Sheets integration without having at least one field selected from the form. Whenever you see the error Please complete or correct all necessary fields before continuing, keep in mind that there is an error within your setup – you either did not select at least one field, there hasn’t been a spreadsheet/worksheet name provided or an URL.
Installed integration management options
After you activate the integration with Google Sheets, and whenever you return to the Installed integrations tab, you will see the screen listed below, where you can find several options for managing your enabled integration.

1. Viewing your spreadsheet
The spreadsheet will be blank until the first submission after activating the integration is made. After this first submission is sent to the spreadsheet, then the form fields and additional submission data (e.g. timestamp, entry ID, form ID, reference ID, form host, IP) will generate the column header row, while each new submission will be collected on individual rows, according to the categories set in the column header row.

2. Pausing your integration
If you want to temporarily stop sending submission data to the spreadsheet, you can switch the toggle available on your installed integration management screen to the Disabled position and data transmission will be paused.
When you are ready to resume collecting data, just switch the toggle to Enabled and all the submissions collected from that moment onwards will be sent to the same spreadsheet you used before.
Please note that all the submissions made during the time the integration is paused can only be retrieved manually, in case you change your mind and want them sent to the spreadsheet.
To do so, export your submissions to CSV, copy the missing submissions, and paste them into your spreadsheet.
However, make sure that you add the information to new empty rows and avoid adding any new columns, as this will break the integration.

3. Editing your integration
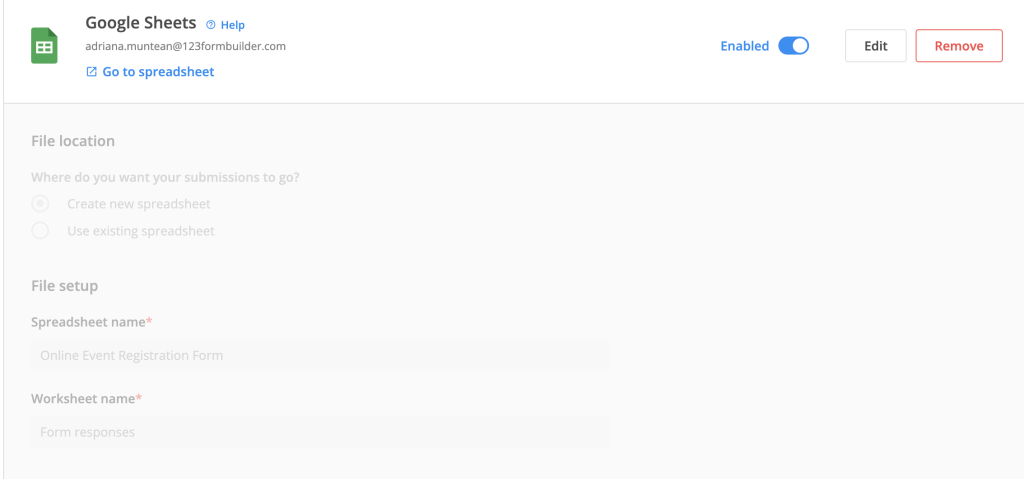
You can easily edit the Google Sheets integration by clicking on Edit button.

Once you click Edit button, you’ll notice that the File location & File setup are greyed out – these can not be modified.
4. Removing your integration
You can end the integration between your form and the Google spreadsheet at any point during the set up flow by clicking on the Remove button available in the integration header, or when active, by clicking on the same button in the installed integration management screen.
Removing the integration and adding it again always creates a new spreadsheet, no matter if you connect a previously disconnected account. The connection with any old spreadsheet can not be restored.

FAQs
For the legacy version of the Google Sheets integration, please check this article: https://www.123formbuilder.com/docs/legacy-google-sheets-integration/
I have a set-up created on the previous flow, where the integration is installed while my Google account is disconnected. What happens on the new flow, where I can’t see the integration anymore in the Installed tab and the Disconnect/Connect account option is no longer available for me to reconnect my account?
On the Add integrations screen, locate the Google Sheets integration and click on the Connect button. In the next screen–as shown below—, simply select the account you want to reconnect from the list and click on it.

Your integration will be automatically activated and you will be taken directly to the Installed integration screen, where you can manage your active integration.
From now on, please use the available options to manage your integration:
- enable/disable the integration, which pauses data transmission but keeps the connection to the same spreadsheet;
- remove the integration, which terminates data transmission and the connection to the spreadsheet. After using the remove option, a new spreadsheet will be generated each time you connect, no matter the account.
Is there any way to import previous submissions to the Google spreadsheet?
The Google Sheets integration will start sending the information submitted via the form to the spreadsheet only after it has been activated.
At the present moment, we cannot import any submissions made prior to that. What we can recommend in this case is to export your submissions to CSV, copy the older submissions, and paste them into your spreadsheet.
However, please make sure that you add the information to new empty rows and avoid adding any new columns, as this might break the integration.
Can I upload files to Google Drive using the Google Sheets integration?
You can’t upload files to your Google Drive using the Google Sheets integration.
If you need to upload files via a form, you need to use the file upload field. The files uploaded using this type of field will show up in the Google spreadsheet as hyperlinks. From there you can download them.
If respondents update their submissions, will the information be updated in the Google spreadsheet, as well?
The Google Sheets integration only sends information over to the spreadsheet on the initial submission. Editing an existing submission will not trigger a new one, therefore the updated information will not be sent over through the integration.
The form would need to be resubmitted with the update info in order to generate a new row in the spreadsheet.
Can I change the Google spreadsheet name?
The Google spreadsheet can be renamed.
Can I move the Google spreadsheet to another folder?
The Google spreadsheet can be moved to another folder.
My Likert scale field does not have all the statements sent to Google Sheets. What is going wrong?
Currently, we are experiencing some difficulties with the likert scale field sent to Google Sheets. If you have statements from your likert scale missing in your Google Sheets, we recommend going to your Google Sheets integration and edit it by unchecking, then checking the likert scale field and saving the integration once more.
We do understand that this is not the optimal way of doing things, but we are working on improving the flow so we could help you automate your workflows.
Related articles
Similar Articles
Frequently Asked Questions
Here is a list of the most frequently asked questions. For more FAQs, please browse through the FAQs page.