How to create WordPress posts through form submissions with 123FormBuilder?
On the 123FormBuilder form creator, you can create new posts on your WordPress site through form submissions. You’ll need the 123FormBuilder plugin for WordPress and the steps described below to create a new post after each submission. To create posts through form submissions, go to the Integrations section of your form, and add WordPress. The application box will drop as seen in the image below:

1. Provide the URL of your WordPress blog and click on Connect to WordPress.
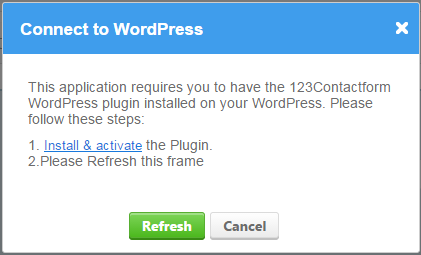
2. If the 123FormBuilder plugin is not yet installed on your WordPress account, a frame will pop up on the screen as seen below. Click on Install & activate and you’ll be redirected on WordPress to access your account to install and activate the 123FormBuilder plugin. After that, return to the frame and press Refresh. If the plugin was already installed before this step, you’ll be redirected to the WordPress Posts customization lightbox, to map form fields with WordPress post fields.
Note: If you have already installed the 123FormBuilder plugin on your WordPress site, but get this frame on screen, make sure the plugin has been activated and hit Refresh.

3. In WordPress Posts → Global Settings, set the author of the posts, the status of the posts, the posts’ format, and if the respective posts accept comments or not. These settings are applied for all submissions on the form. Only WordPress users can be selected as post authors.

4. In WordPress Posts → Default Post Fields, you can provide a default value or associate form fields to the title of the post, content, excerpt, tags, and featured image. You can only associate File Upload fields to Featured Image. Tags are separated either by a comma or by the Enter key of your keyboard.
5. Now you have to select the categories where the posts will be grouped in. You can either set all posts to be grouped in the same categories or allow form users to select the categories before submission.

- Preselect categories. Use this option if you want to group all posts in the same existing categories of your WordPress site. All categories can be viewed and select in the list below. Select All Categories to group posts in each existing category of your WordPress account or Select Categories to manually select the categories you want.
- Allow users to select categories adds a dropdown list where you can map a Radio buttons, Checkboxes, or Dropdown field from your web form. However, selected categories in the list below will overwrite the available choices you have added in the Form Editor.
6. In WordPress Posts → Custom Post Fields, you can associate form fields with custom fields from your WordPress account. WordPress custom fields are displayed on the left and form fields on the right, through the dropdowns.
7. Your email associated with the 123FormBuilder account will be automatically added in the WordPress Posts → Error Handling section. In case the integration fails for a form user because of a bad network connection, you’ll be notified by email. You can change the email address at any time in this section.
8. In the end, press Save. From now on, each submission will create a post on your WordPress blog. Check your WordPress account to see the results. In your 123FormBuilder account, go to the Submissions section of your online form to manage your entries.
Whenever you want to adjust your settings, return to the application, and press the Customize button to enter the customization lightbox.
2 comments
Leave a Reply
Your email address will not be published.
Similar Articles
Frequently Asked Questions
Here is a list of the most frequently asked questions. For more FAQs, please browse through the FAQs page.
I want an online trivia soccer quiz contests template.
Hello here is a quiz template that might come in handy: https://www.123formbuilder.com/free-form-templates/Trivia-Quiz-428230/