How to publish 123FormBuilder online forms on WordPress?
The web forms created with 123FormBuilder can easily be published on your WordPress website using the embed codes provided for you in the Publish section.
It is worth noticing that there are two options of publishing a 123FormBuilder form on WordPress.org, depending on the version of WordPress.org.
WordPress.org older than version 5
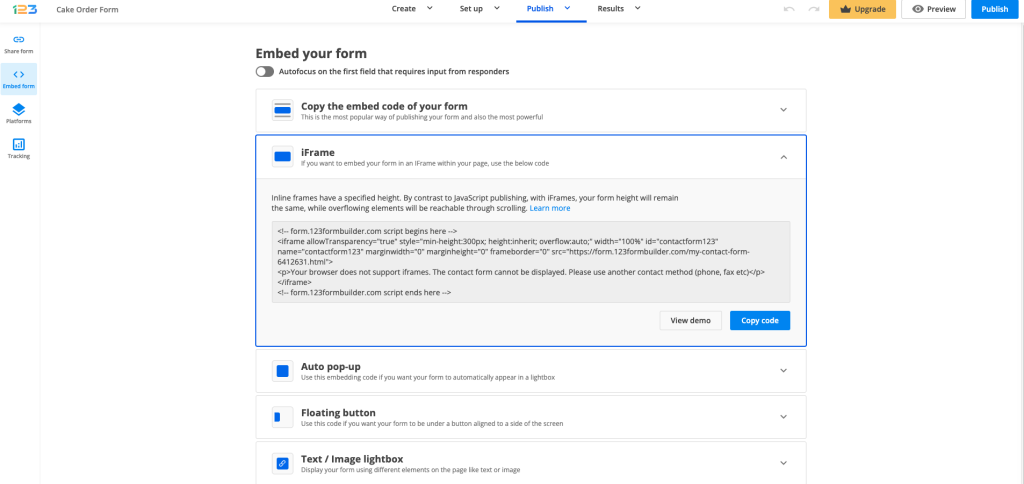
1. In your form builder account, select the desired form and go to the Publish section. From Embed form, copy the IFrame code.

2. On WordPress, select the page or post where you want to publish your form.
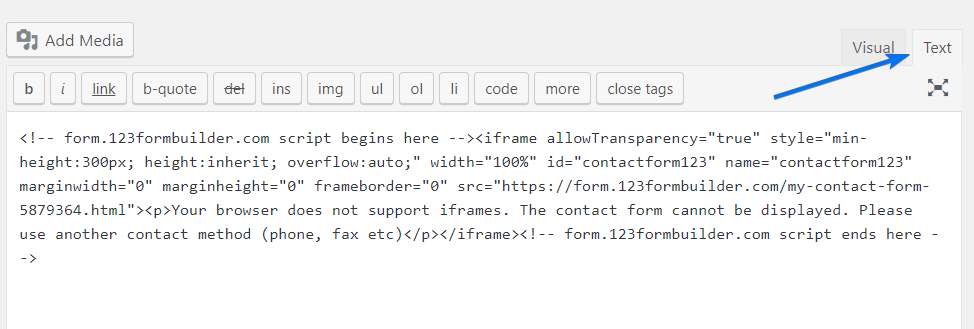
3. Switch the page/post editor from Visual to Text and paste the code.
4. Don’t worry if the form will not display properly when you turn the editor back to Visual mode. The form will be visible on your WordPress website when you Preview Changes and Update/Publish your page/post.
It’s worth mentioning that the IFrame embed method has a default height of 300px, allowing users to navigate through the form by scrolling it. You can remove the scrollbar specific to this publishing method by increasing the height from the IFrame code. See the highlighted example below:
<!-- form.123formbuilder.com script begins here --><iframe allowTransparency="true" style="min-height:1500px; height:inherit; overflow:auto;" width="100%" id="contactform123" name="contactform123" marginwidth="0" marginheight="0" frameborder="0" src="https://form.polarbuildingcleaning.net/my-contact-form-5879364.html"><p>Your browser does not support iframes. The contact form cannot be displayed. Please use another contact method (phone, fax etc)</p></iframe><!-- form.123formbuilder.com script ends here -->You can also publish your form by using the Javascript code from the same Publish section and following the same steps explained above.
If your 123FormBuilder form has a 3rd party redirect, additional settings need to be applied.
Having a 3rd party redirect on your form would mean, for example, to have a payment processor added on the form.
Let’s take PayPal as an example. By default, after your respondents would click on the Submit button, they would be redirected to PayPal in order to complete the transaction. After the payment transaction is successfully completed, respondents would return to the checkout ending message displayed on the form, and not on your WordPress.org website.
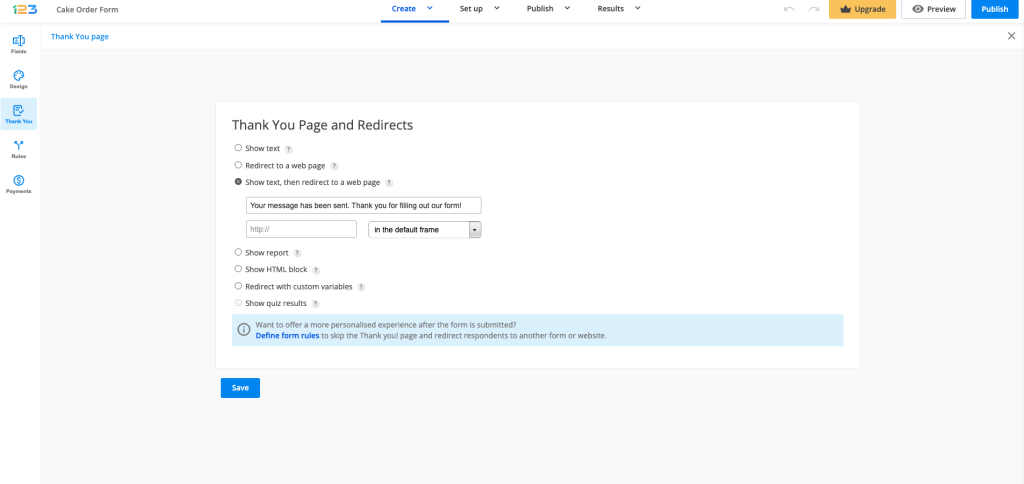
In order to make sure that your respondents would return to your WordPress.org website after completing the online transaction, some tweaks need to be done to the Thank you page section.
Select Show text, then redirect to a web page option and leave the “in the parent frame” option selected – this would mean that the respondent is redirected to the parent (initial) URL.

In the above text box, you have to introduce the URL visible for Permalink, below the title of your WordPress page.
After saving your WordPress.org page and publishing it, your respondents will be able to see your 123FormBuilder form embedded on your page, make payments and be redirected to your WordPress page after completing the payment.
WordPress.org latest versions
The latest version of WordPress.org is 6.1. Starting from version 5, WordPress has introduced the block editor, making it easier for you to create your WordPress page.
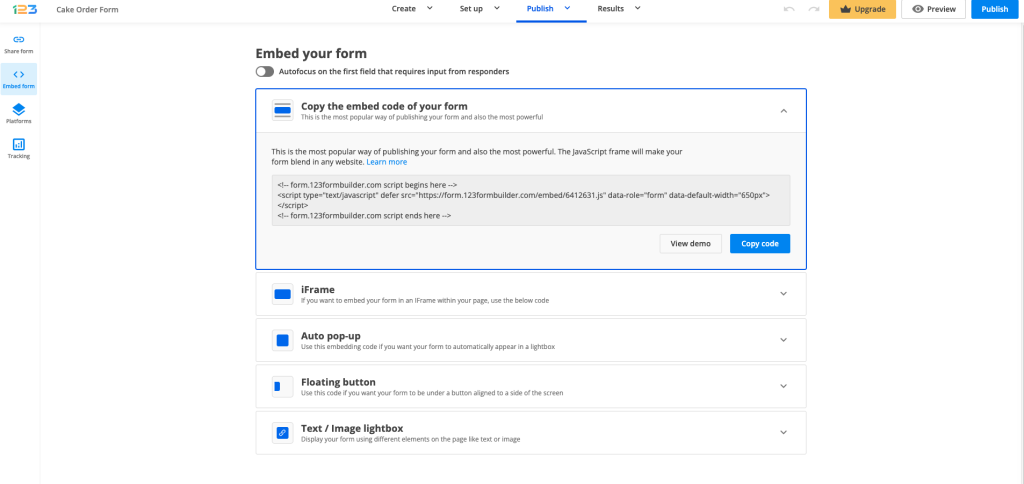
When creating your page for WordPress, all you have to do is to insert a custom HTML block. Inside the custom HTML block, paste the Javascript embedding code of your form.

If your 123FormBuilder form has a 3rd party redirect, additional settings need to be applied.
In order to make sure that your respondents would return to your WordPress.org website after completing the online transaction, some tweaks need to be done to the Thank you page section.
Select Show text, then redirect to a web page option and leave the “in the parent frame” option selected – this would mean that the respondent is redirected to the parent (initial) URL. In the text box, input the URL of your WordPress.org page.

After saving the WordPress page and publishing it, your respondents will be able to complete the form posted on your page, make the payment and be redirected to your WordPress page if the above steps have been followed.
That’s it! Now you can sit back, relax, and wait for submissions to roll in from the forms published on your WordPress website.
Similar Articles
Frequently Asked Questions
Here is a list of the most frequently asked questions. For more FAQs, please browse through the FAQs page.

