How to Create Effective Dynamic Forms in Salesforce?
Using dynamic forms in Salesforce can be a powerful thing.
Let me explain why.
When you’re telling users that it will take 10 minutes to fill out an online form, on the other side of the laptop many of them shake their heads in rejection and close the tab. But, I’m sure that also shows in the number of submitted forms.
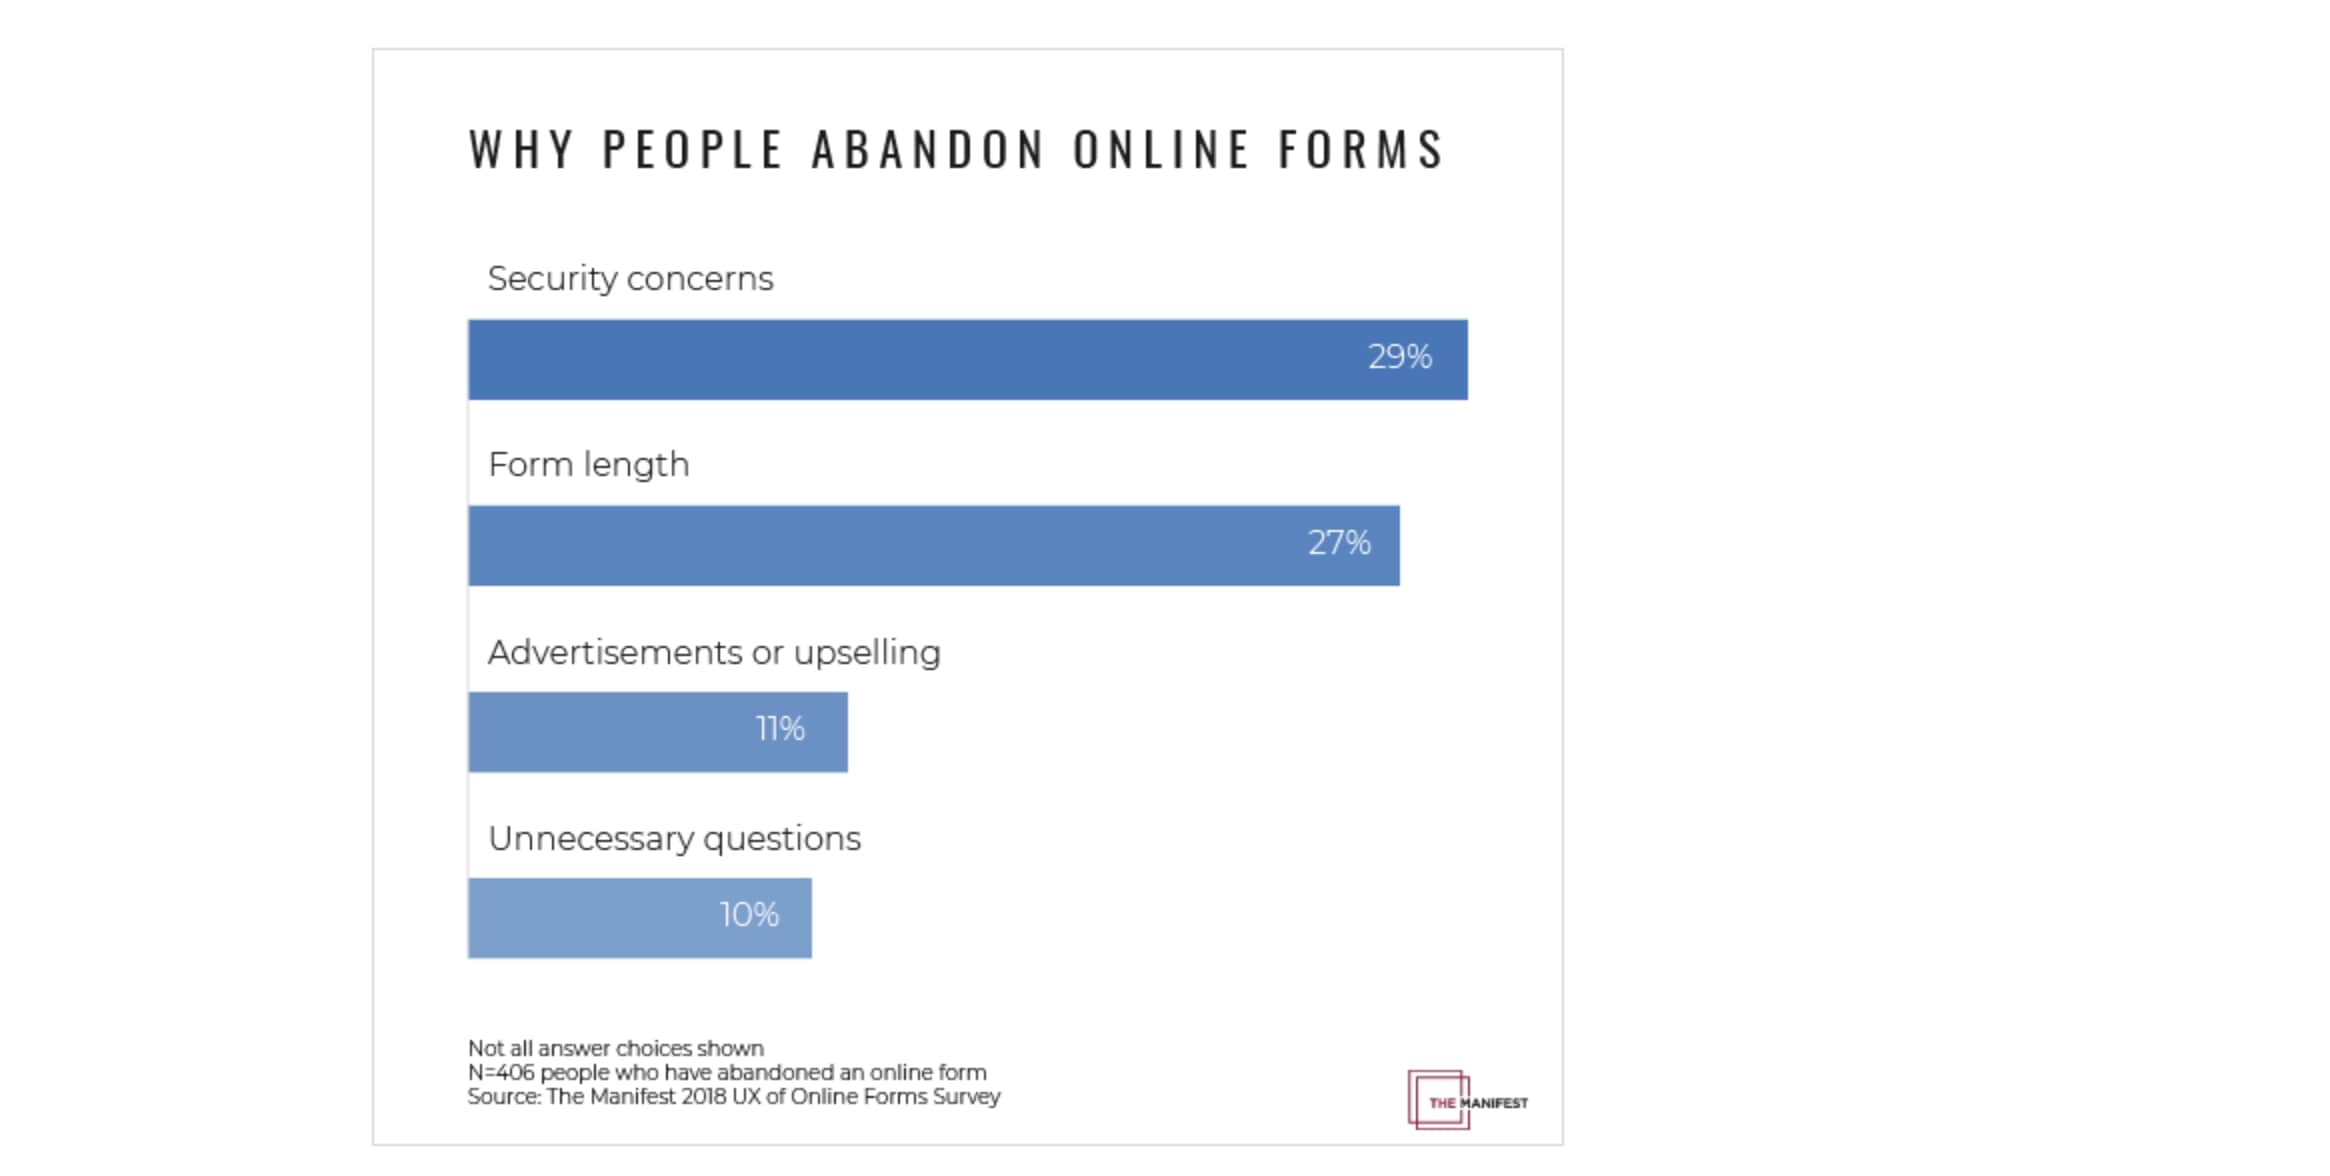
In most cases, a lengthy web form can be cut down in half and still collect all the data you need AND with an even better response rate. This is where the power of dynamic forms shows.
Customers don’t need to fill out all the fields (because not all questions are relevant). But reading through all of them adds time. They also don’t have to re-enter the same information multiple times. It adds frustration.
Suddenly, keeping it short and relevant becomes a priority, and for a good reason.
We’ll show you how to do that with 123FormBuilder’s dynamic forms in Salesforce. But before we jump into it, let’s cover some basics.
What are Dynamic Forms in Salesforce?
Dynamic forms are online forms that allow you to adapt fields and display information based on the user’s input. You can show or hide fields as the user fills out the form, prefill it with existing data (pulling it from Salesforce) and give the user a personalized experience.
For example, when you build a form in the Salesforce app with a form builder such as 123FormBuilder, you can connect it to any Salesforce object (customer or standard), push data into SF, or retrieve it without any intermediary. You also have the freedom to choose whether you push all data into Salesforce or send it only when a specific condition is met.
Let’s see how exactly you can create dynamic forms in Salesforce with some examples.
Shall we?
How to Create Dynamic Forms in Salesforce?
4 Easy Ways
We’ve established that the dynamic nature of a form is rooted in its ability to change in real-time and generate appropriate next steps. Below we’ll use a couple of examples to explore what gives the form such abilities.
Let’s say that a company’s call center is looking to improve efficiency. Can they do that with a dynamic form? Absolutely.
Read on to find out how.
1. Use Field Rules
When a client rings the call center, the customer support agent can quickly identify them in Salesforce using their customer ID or any other personal detail. Once identified, they’ll open a form that helps them pinpoint the customer’s issue and qualify it. For example, if they have a problem with the device, the agent will fill that out on the form, displaying only the fields relevant to that specific issue.
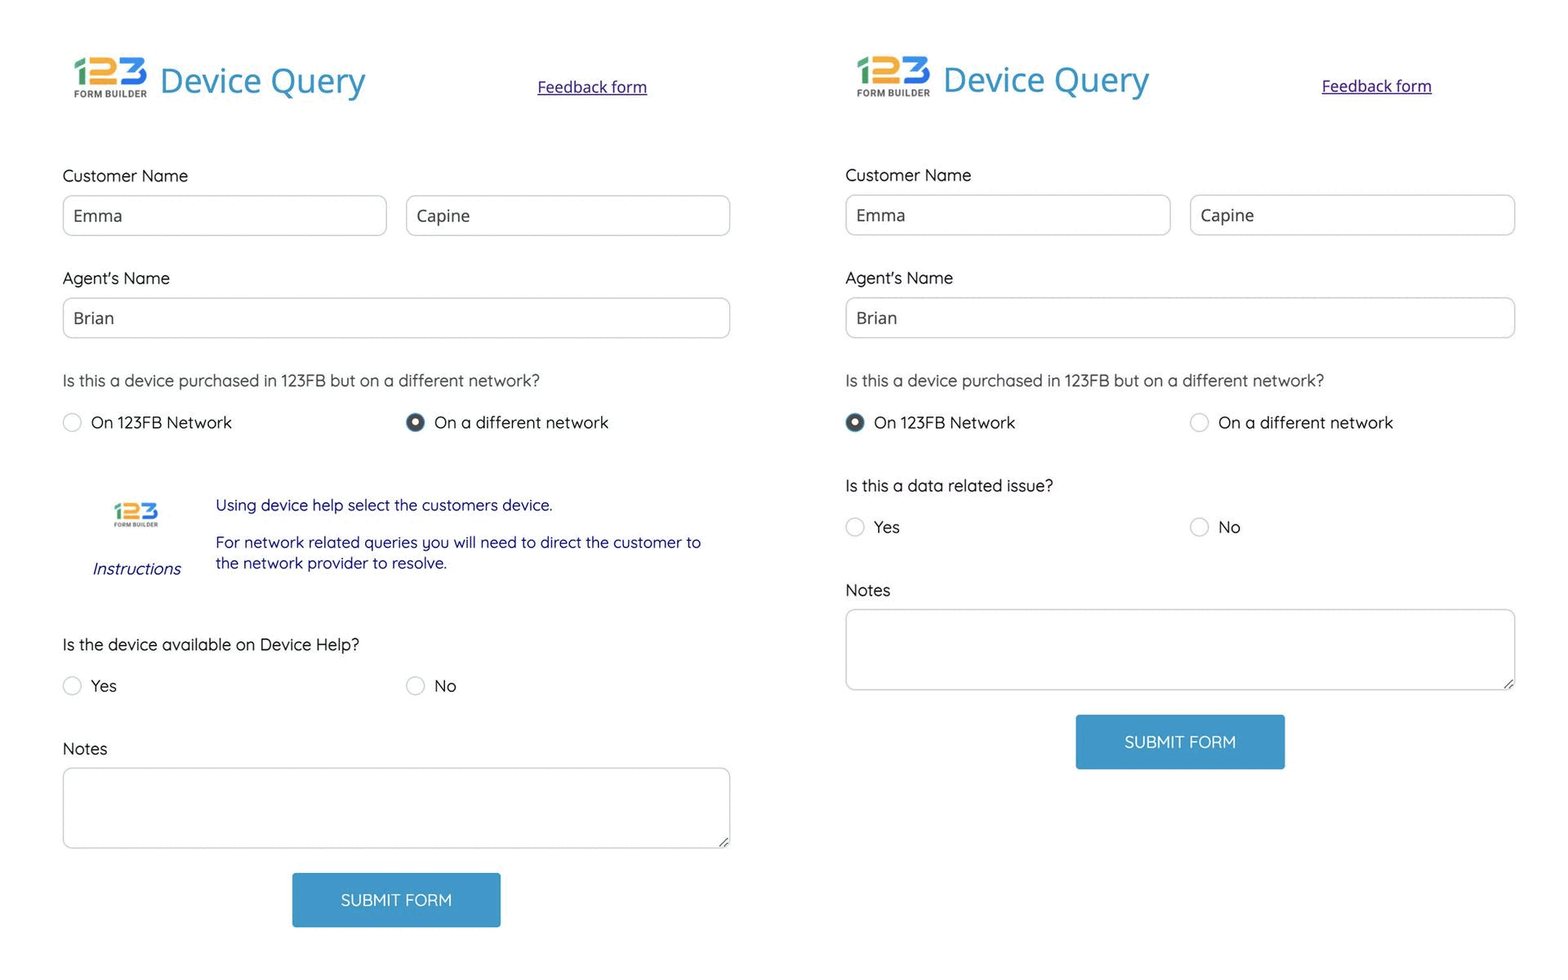
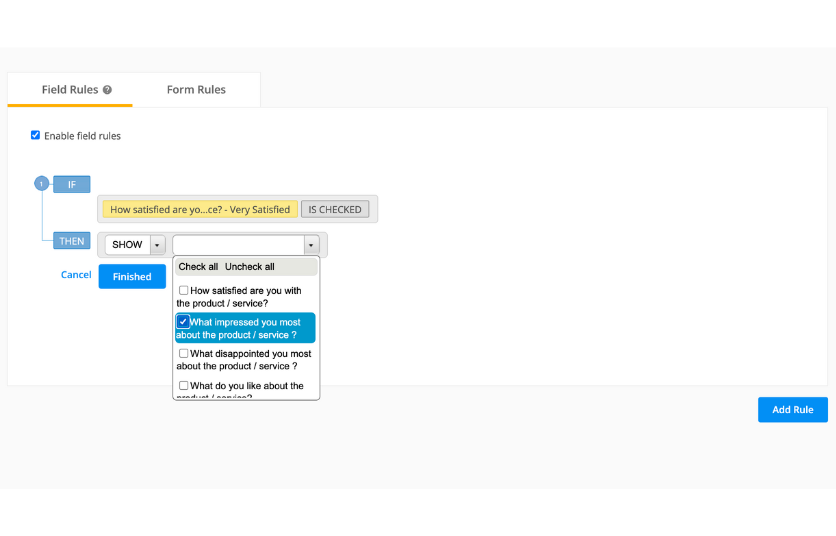
Each issue will unfold a different process, each containing a set of questions applicable to the topic. So basically, fields appear based on the answer to the previous question. We call them Field Rules, and you can define them using 123FormBuilder’s conditional logic or question branching.
2. Create Autoresponders
As you move along with the questionnaire, you might get to a question that requires you to send the customer additional resources, such as a guide, some instructions, or a contract.
In our example, the customer care agent wants to know wherever the customer chooses to self-serve. If the customer answers “Yes”, the next step would be sending them a step-by-step self-service guide.
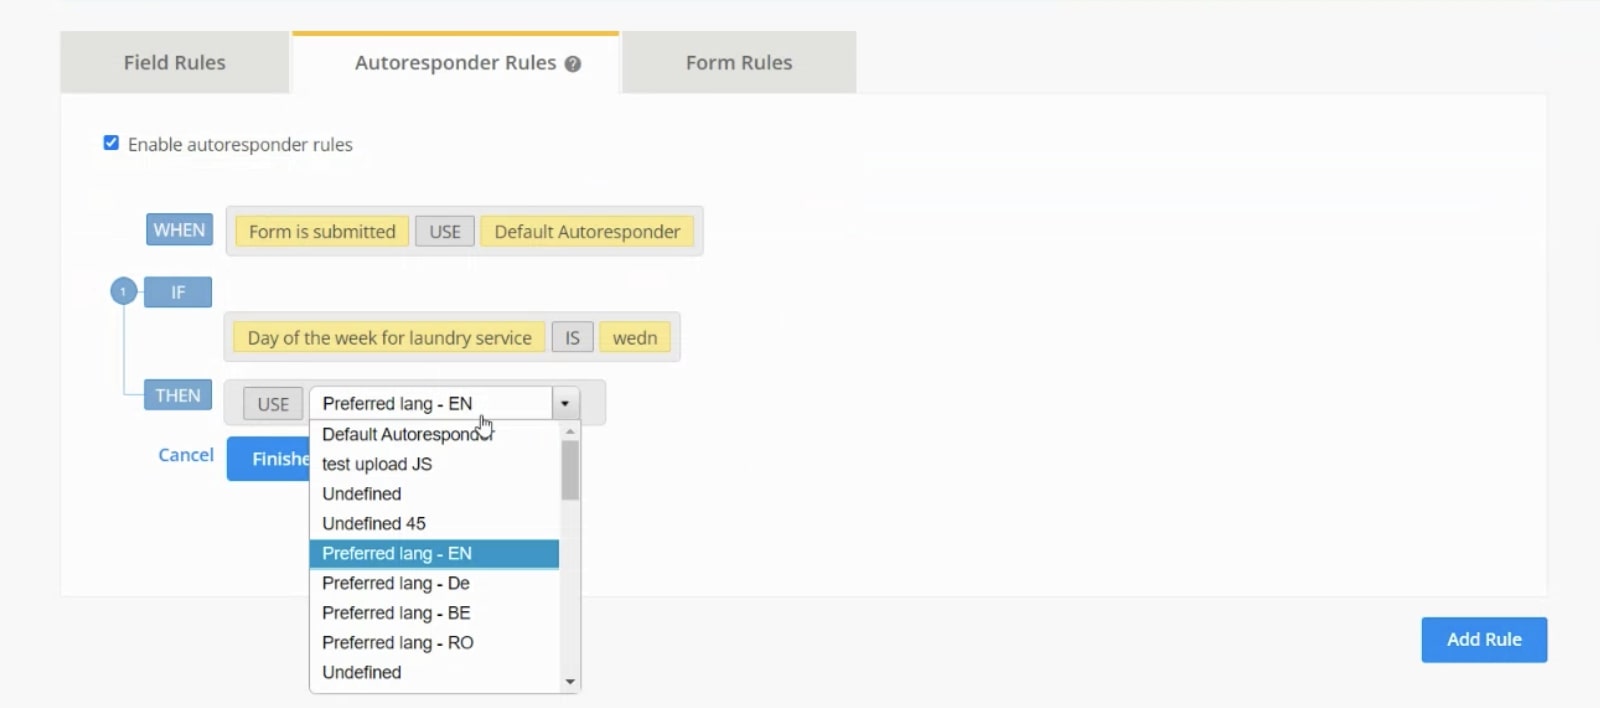
Typically, the agent would make a note to send them later on an email with the guide. But, with a Salesforce dynamic form, you can set an Autoresponder Rule where resources can be automatically sent to the customer right after you submit the form and end the conversation. In 123FormBuilder, you can do that right in the app without having to access some other tools.
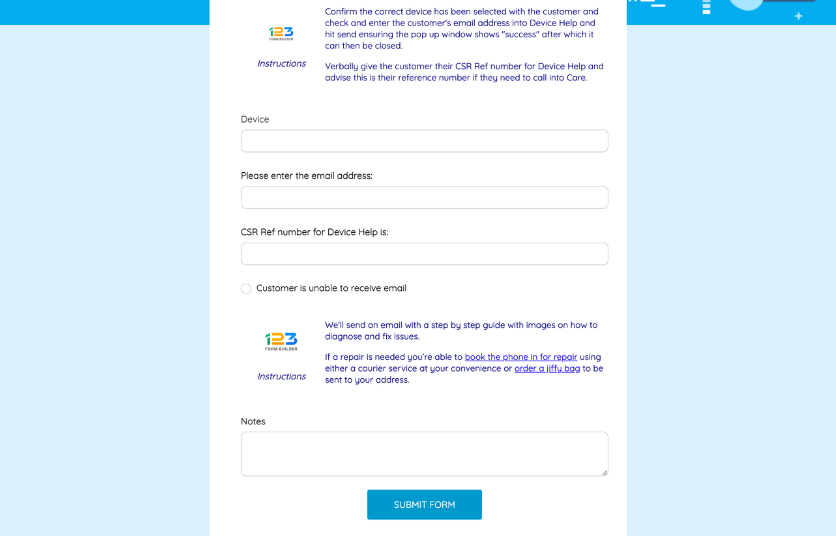
You can create autoresponder templates based on your processes and the most common resources your customers need and send them according to the conditions you set. In addition to that, you can also pick a preferred language for the autoresponder.
3. Expand the Journey with Form Rules
Every form has a purpose. Maybe you’re using one to collect email addresses, receive orders, or schedule appointments – and once it’s submitted, the form’s job is done.
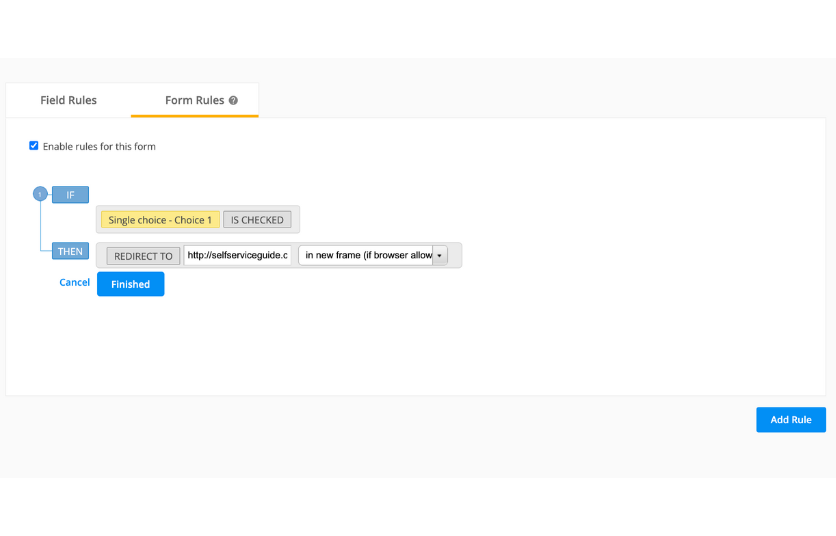
But there are cases, like the call center one, where the customer’s answers might require additional inquiries or steps. For example, if the client mentions that they would need to book a repair for their broken device, the agent would tick that on the web form, and it would redirect the agent to another form to book a repair on behalf of the customer. This is possible thanks to form rules that redirect the user to another web page based on what was selected on the form.
4. Invite Collaboration with FormOwner Notification Rules
Just like you would be redirected to another form, having another team be notified and involved might also be the case. Suppose a customer wants to cancel the contract or return a product. When the client or agent ticks off these options, the form can do two things:
- Automatically send a notification to the Retention Team informing them of the client’s decision. It allows the retention team to contact the dissatisfied customer quickly, find out more about their reason for canceling and craft an offer that could entice them to stick around.
- Redirect the user to a cancellation page with a comprehensive guide.
You can set these notifications right in the form. They are a great collaboration tool across teams, as you can quickly notify team members and address customer needs. Using them saves time, increases efficiency and responsiveness, and positively impacts customer retention and satisfaction.
On top of these four great ways to create dynamic forms in Salesforce, there are two features that make data collection easy and intuitive.
- URL prefill – which means that every time you go to a contact and open their form, you’ll have their details already prefilled.
- Dynamic prefill – when you enter the contact’s email address in a field, the form recognizes that data and pulls from Salesforce records the rest of the contact’s details, automatically prefilling some of the form’s fields.
You don’t need a dozen online forms to collect different types of information or to create Salesforce records.
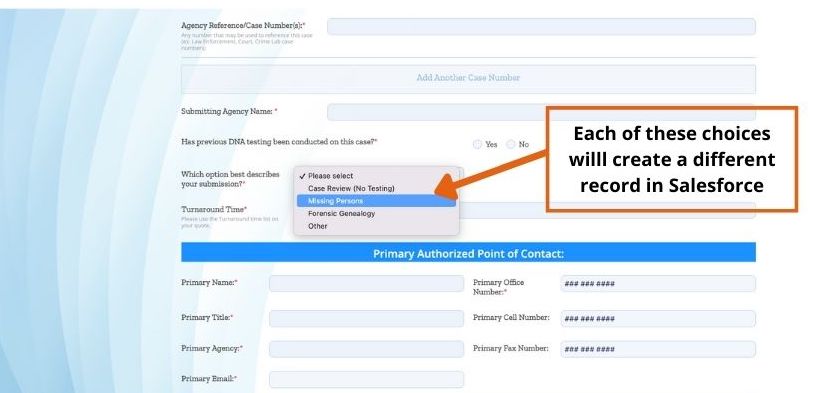
You only need one dynamic form that can adapt to the user’s input. This way, every time the user chooses an option or types in an answer, a different record will be created in Salesforce. You can easily set up this in Object Mapping in Salesforce, and it’s a life saver.
4 Benefits of Building Salesforce Dynamic Forms with 123FormBuilder
1. Increased customer retention
Any experience that delights and proves that you listen and care for your customers will most likely prevail over an unpleasant event. Acting quickly sometimes can make a big difference, but you need the right tools. Dynamic forms can help you become more responsive to customer requests and solve time-sensitive issues without risking losing customers.
2. Saved times & improved efficiency
Customers also pay attention to how vested you are in building an engaging and convenient experience for them. Filling out a form that adapts to their answers and keeps the process short and sweet is always a major win. While it saves them time, it also increases the submission rate. The same applies to your staff. With dynamic forms, you can make it easy for them to collect, record, and retrieve data so they don’t double work.
3. Accurate data in Salesforce
With a single dynamic form, you can create multiple types of records in Salesforce, ensuring that every bit of data you collect shows up in Salesforce. You don’t have to worry about “flipping” through submissions and searching for information. You’ll have peace of mind that you have all the data you need at your fingertips.
4. No code dynamic forms
Time is of the essence not only when filling out forms but also when building them. Maybe when you first came across dynamic forms, you thought you needed a dev team to give you a hand with that. When you make them with 123FormBuilder, you don’t need any development skills and not a single line of code. It’s all about the proper settings. That’s it.
Want to explore these options? If you already use 123FormBuilder connect it to Salesforce right in your app. If you’re new around here, sign-up now for an account and get started.
Load more...