Managing custom email templates
In this article, you will learn how to manage your custom email templates and understand how they work.
How to create and save custom emails
Start by customizing our default email template. You can add text, images, links, custom variables, and even customize its design with HTML code. For detailed instructions, check our How to set up the Body of your email notifications guide.
When your template is ready to use, click where it says Default notification template (edited) and choose to Make this draft a template. Give your template a descriptive name.
More details about email templates you can find in this article.
How to apply custom templates to different forms
Let’s say you want to use the same custom template on a new form. Since the field IDs are newly generated, you need to adjust the original template.
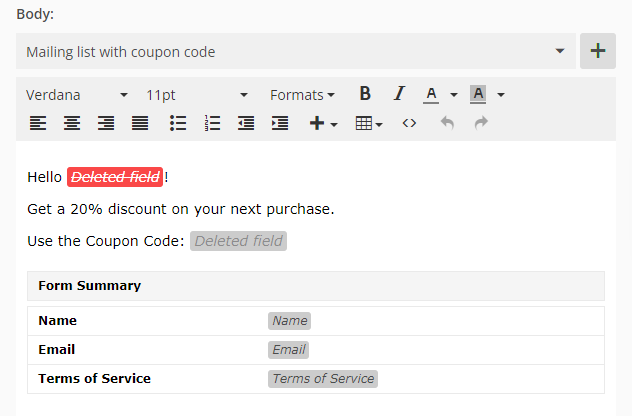
The Form Summary table will automatically render the form variables. If your custom template has field variables placed outside the table, you need to replace them.
Any form fields that aren’t located in the Form Summary table will show as Deleted fields. All you need to do is to replace deleted fields with your current form fields variables.
To replace Deleted fields, hover over each field and click to remove it.
Next, click the plus sign displayed next to the Body dropdown. Choose your form fields one by one. This action will replace the old field IDs with your current fields.
Don’t forget to give your current template a new name and Save the changes.
Related articles
Similar Articles
Frequently Asked Questions
Here is a list of the most frequently asked questions. For more FAQs, please browse through the FAQs page.
